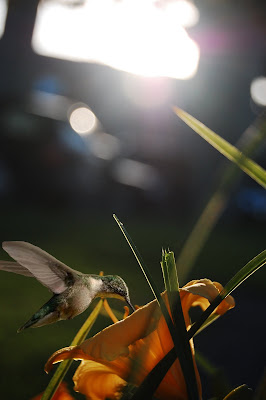

For this picture i took the hummingbird pic and pasted it onto the flower picture. I then had to use one of the filters to lighten the hummingbird picture so it would blend in with the picture more. Then I began to very carefully erase around the bird. To do this really closely, I zoomed in so i could erase the individual pixels around the hummingbird. It took a while to do since the difference in color of the bird and the background of the original bird picture were very similar.
You did a really good job merging the layers together; it look like one picture with no differentiation. Try using the scissor select tool next time. I find it's faster than erasing around an object. When you use the tool, try to cut as close as you can, but it's better to be a little bigger than smaller. When you copy and paste the selection into a new layer, give that layer a layer mask. You can then paint in black to "erase" to see the layer behind. I find it's much easier.
ReplyDeleteThis looks amazing. I really would have had no idea you added the hummingbird unless you told us. I don't know what the hummingbird looked like before you lightened it, but right now the lighting is perfect. It has the same highlights as the flower does.
ReplyDeleteWow, this is awesome. How did you ge the himming bird to be behind, but infront of the flower? Good job!
ReplyDeleteAlex, this is great. The pictures really blend well together. I was wondering the same as Deanna. Did you have to change the lighting?
ReplyDelete