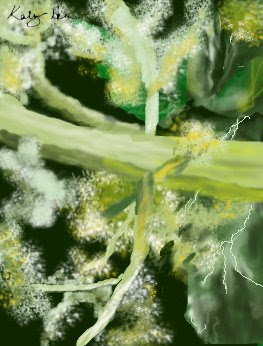
This is the seedy part of a rhubarb plant based off of a picture I took. It's impressionist at best, but for painting with a mouse, I don't think it's too bad.
I was able to change my canvas size by using the exact-o knife tool; this made canvas smaller and I was able to orient it portrait wise.
The key for me was using lots of layers. I had a total of four layers--background, background leaves, foreground leaves, and the foreground rhubarb. Having layers enabled me to create certain parts of the picture and be able to fix certain areas without having to erase the entire picture.
I relied on the smudge tool for the background. I created the leaves with the paintbrush and airbrush, making them slightly blurry, but then I used smudge tool heavily to make them really blurry.
The foreground was created entirely with different types of paintbrushes. The calligraphy brush enabled me to get a flowing rhubarb stem. By changing the opacity of the paint and the size of the paintbrush used I was able to create the shading on the stem. The "frilly, bushy" seeds were made using special paintbrushes (they almost look like paint spatters). By using three different colors, changing the opacity of the paint, and altering the concentration of the paint I was able to create a fluffy-ish texture.
This is beautiful. I don't actually know what rhubarb looks like, but this picture is really pretty. The layering and highlighting you used is amazing.
ReplyDeleteThat is really cool! Good job on all the layers.
ReplyDeleteThanks. I'd really recommend using the layers. Make sure you lock them before you move onto a new one and have the new layer highlighted before you start to paint. I didn't do that on the first few layers and had major problems with what I did not coming up on the right layer. Control-Z was my savior!
ReplyDelete